If you work in process automation, manufacturing, or bulk material handling, you know how critical a Vega level transmitter is to keeping operations running smoothly. These devices are built for harsh conditions—temperature swings, dust, moisture, and constant exposure to chemicals or abrasive materials are all part of their day-to-day job. But even the most reliable industrial tools can run into hiccups over time: maybe the calibration is off, a parameter got accidentally changed during a maintenance check, or you’re moving the transmitter to a new tank or application and need a fresh start. That’s where resetting to factory settings comes in. As a Vega level transmitter supplier with over 10 years of working directly with industrial teams, I’ve lost count of how many times I’ve guided customers through this process to get their gear back on track. The good news is that resetting isn’t complicated—when you do it the right way, you can avoid common mistakes that lead to downtime or incorrect readings. I’m going to walk you through every step here, based on hands-on experience with Vega’s most popular models (like the Vegapuls 6X, Vegabar 8X, and Vegason 7X) and real customer scenarios I’ve supported over the years. Vega Level Transmitter
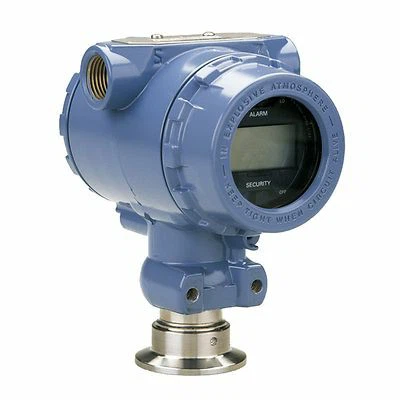
First, let’s talk about why a factory reset is a go-to solution for most transmitter issues. A lot of people jump to resetting when they’re dealing with persistent errors that troubleshooting guides don’t fix—like a level reading that’s higher or lower than the actual material in the tank, or a communication error that won’t clear after updating firmware. Or maybe you’re reusing a transmitter from an old project: the previous setup was tuned for a different tank shape, material type, or mounting position, so even if the transmitter works, it’s not optimized for your new application. Resetting to factory settings wipes all custom configurations back to the default parameters Vega designed for that model, which eliminates any lingering configuration conflicts. That said, I always tell customers to exhaust simpler fixes first—checking wiring, verifying power supply, or updating firmware—before resetting. A full reset erases every custom setting, so if you don’t save that info first, you’ll have to reconfigure everything from scratch. That’s a common misstep I see all the time: a team will reset without backing up their settings, then spend hours re-calibrating something that would’ve taken 10 minutes with a quick backup.
Now, before you start the reset process, gather the right tools and take a few pre-step precautions to avoid mistakes. You’ll need: the transmitter’s manual (yes, I know manuals get lost in the toolbox, but Vega makes them available for free download on their official site, so pull up the guide for your specific model first), a communication interface (Vega offers the Vega Tools software, paired with a USB adapter like the VEGA Tool Connect, or a handheld programming unit like the Vega PACTware Handheld), a stable power supply for the transmitter (don’t rely on the process wiring alone—connect a test power source if possible to avoid mid-reset glitches), and safety gear appropriate for your facility (lockout/tagout if you’re working on live equipment, to keep yourself and your team safe). The most important pre-step, though, is backing up your current settings. With Vega Tools, you can save a configuration file to your laptop in 30 seconds. Even if you think you’ll never need it, save it—last year, a food and beverage customer of mine reset a Vegason 7X for a new tank and forgot to back up. They had to re-do the calibration for their viscous syrup material, which took two hours because the default settings worked for water, not their product. Don’t be that person.
Next, let’s break down the reset process by model, because Vega’s different lineups use slightly different methods—something I’ve learned the hard way, when I tried to reset a Vegapuls 6X using the Vegabar 8X steps and accidentally started a partial reset instead of a full one. First, the radar models (Vegapuls 6X, Vegapuls 8X, Vegapuls C): These are the most common level transmitters for liquid and solid bulk applications. For most of these models, the reset is done via Vega Tools or the handheld programming unit. Here’s how it works: connect your Vega Tool USB adapter to the transmitter and your laptop, open Vega Tools, select your transmitter from the device list, and click the “Device Settings” tab. Look for the “Factory Reset” option—for radar models, it’s usually under the “Maintenance” submenu. You’ll get a pop-up warning that this will erase all custom settings; if you backed up, click “Confirm” and wait 2-5 minutes. During this time, don’t disconnect power or the adapter—interrupting the reset can brick the transmitter, which is a costly mistake I’ve only seen once, thanks to a plant electrician who had to shut down power mid-reset to fix a line issue. If you don’t have Vega Tools, you can also do a manual reset via the transmitter’s display: hold the “Enter” and “Escape” buttons simultaneously for 10 seconds, until the display shows “Factory Reset Initiated.” This method is great for when you’re on a remote site without a laptop, but double-check your manual because some models require holding the buttons for longer (like 15 seconds for Vegapuls 6X vs. 10 for Vegapuls 8X).
Next, the pressure and hydrostatic models (Vegabar 8X, Vegabar 14X, Vegawave 62): These are used for liquid level in tanks with varying pressure, so their reset process is a little different because they include pressure calibration settings. For these, always use Vega Tools for a full reset to avoid misconfiguring the pressure range. The steps here: connect the adapter, launch Vega Tools, select the transmitter, go to “Device Functions,” and choose “Reset to Factory Defaults.” One critical note here: if your Vegabar is a seal type (where the sensor is remote from the transmitter), do NOT reset the sensor alone—reset the entire device to keep the seal synchronization intact. I’ve had a customer who reset only the transmitter, and the remote sensor showed a pressure reading that was 20% off because the seal data wasn’t synced. That cost them a partial production shift to correct, so it’s a key detail. For manual reset on these models, it’s similar to radar: hold the “Plus” and “Minus” buttons for 12 seconds, but wait for the display to show “Pressure Settings Reset” specifically, not a general reset—some lower-end pressure models have separate resets for pressure and level, so make sure you select the right one.
Then there are the ultrasonic models (Vegason 7X, Vegason 8X): These are used for open-channel flow and liquid level where radar might be blocked by foam. Their reset process is a bit more sensitive because ultrasonic sensors rely on signal path tuning to avoid interference. For Vegason models, the best method is via Vega Tools, and before you reset, make sure there’s no material in the tank that would cause a false reading after reset. Once you initiate the factory reset, the transmitter will automatically run a 30-second sensor self-test to clear old signal data—don’t interrupt this test, because it’s part of ensuring the sensor is ready for new settings. A common mistake here is resetting an ultrasonic sensor in a half-full tank: the default range is usually 10 meters, so if your tank is only 5 meters deep, you’ll have to adjust the range after reset, which is easy to fix, but doing the reset in a full or empty tank will give you a more accurate baseline.
Once the reset is complete, you’re not done—you need to reconfigure the transmitter to match your application, because the default settings are generic and won’t work for your specific tank. This is the part where backing up your old settings pays off: if you saved the file, you can import it into Vega Tools in 2 minutes, and the transmitter is ready to go. If you didn’t save it, here are the key settings to configure, based on my experience: first, set the measuring range—measure your tank’s total height, minus a 5% buffer at the top to avoid signal interference from the tank wall. For example, if your tank is 10 meters tall, set the range to 9.5 meters. Next, set the empty and full points: empty is usually 0%, full is 100% at the bottom of the buffer. Then, adjust the output signal: most customers use 4-20 mA, so set 4 mA at empty and 20 mA at full. If you’re using Modbus or HART communication, verify the protocol settings to match your control system. Finally, run a quick test: fill the tank with a small amount of material and check the reading, or use Vega Tools to send a test signal to your control system. If it’s reading correctly, you’re good to go. If not, double-check the wiring or range settings—more often than not, a quick tweak is all it takes, not a second reset.
I also want to cover a few common issues and fixes that come up after a reset, because even when you follow the steps, things can go wrong. If your transmitter is showing a “No Signal” error after reset, first check that the communication cable is properly connected—sometimes vibration during reset can loosen the plug. If the reading is unstable, that’s usually a range setting issue: you probably set the range too short or too long, so adjust it to match your tank. If you’re getting a communication error with your control system, double-check the protocol settings (baud rate, address, etc.)—the default settings might not match your system. And if all else fails, don’t panic: as a supplier, I offer dedicated support for reset and reconfiguration issues, because I know that downtime costs thousands of dollars per hour for industrial teams. I’ve had customers call me at 2 a.m. during a plant startup, and we work through the reset step by step over the phone, so you don’t have to navigate this alone.
Wait a second—should I reset every time a transmitter acts up? No, that’s not what I recommend. Most issues are fixable without a full reset, which is why I always suggest troubleshooting first: check wiring, update firmware, verify power, or adjust individual parameters. A factory reset is a powerful tool, but it should be a last resort for persistent issues, or when you’re moving the transmitter to a new application. For example, if your Vegapuls 6X is showing a false level reading, first check if there’s foam on the liquid surface—you can adjust the signal damping setting in Vega Tools to fix that without resetting. If the reading is still wrong, then a reset makes sense.
Now, let’s talk about a mistake I see so often that I feel compelled to mention it: using third-party tools to reset Vega transmitters. Vega’s protocols are proprietary, so unapproved software can cause permanent damage to the transmitter, like locking it out or corrupting the sensor data. I’ve had customers bring in transmitters that were “reset” with cheap software from Amazon, and we couldn’t restore them—had to send them back to Vega for repair, which took weeks and cost way more than doing it right in the first place. Always use Vega Tools or the official handheld units, which are designed specifically for their equipment.
At the end of the day, resetting a Vega level transmitter to factory settings is a straightforward process when you take the time to prepare, use the right tools, and follow the model-specific steps. It’s a skill that every industrial maintenance team should have in their back pocket, because it cuts downtime and saves you from having to call a technician every time a transmitter acts up. That said, if you’re not comfortable doing it on your own, or you run into an issue that you can’t fix, don’t hesitate to reach out. As a Vega level transmitter supplier, I work with plants of all sizes—from small manufacturing facilities to large chemical and food processing operations—and my team is here to help you navigate any reset, reconfiguration, or technical question you have. Whether you need a quick step-by-step walkthrough or support after hours, we’re just a message away. We also offer training for maintenance teams on basic transmitter care, resetting, and troubleshooting, so you can keep your operations running smoothly without relying on external help for every small issue.

If you’re dealing with a transmitter that needs a factory reset, or you have questions about optimizing your Vega level transmitters for your application, don’t hesitate to get in touch with our team to discuss your needs and how we can support your operations. Together, we can ensure your level measurement equipment is working as efficiently and reliably as possible, minimizing downtime and keeping your production on track.
Temperature Transmitter References
Vega. (n.d.). Vegapuls 6X Instruction Manual. Retrieved from Vega official documentation portal
Vega. (n.d.). Vegabar 8X User Guide. Retrieved from Vega official documentation portal
Vega. (n.d.). Vega Tools Software User Manual. Retrieved from Vega official documentation portal
Industrial Automation and Process Control Association. (2022). Best Practices for Level Transmitter Calibration and Maintenance. Retrieved from process industry technical resources
Iges Instrument Co., Ltd.
With abundant experience, we are one of the most professional vega level transmitter suppliers in China. Please feel free to buy high quality vega level transmitter in stock here and get quotation from our factory. Good service and low price are available.
Address: No. 103, 1st Floor, Dacheng Commercial Building, Chezhan Avenue, Lucheng District, Wenzhou City
E-mail: igesinst@gmail.com
WebSite: https://www.iges-inst.com/
